|
|
|
 |
||||||||||||
 |
||||||||||||
| Home Page |
|
|||||||||||
 |
||||||||||||
C. Backpacking Cook Kit:
Stove w/fuel
or grill 1-2 pots Matches
Cup Plate Spoon & Fork
Salt & Pepper Cooking Oil Seasonings
Butter or margarine Honey, Jam and/or Jelly Paper towels
Dish soap or pads Spatula Frying pan (optional)
2. WATER. 1 gallon/person
A. Storage.
Store water in containers you can move. Be prepared to either carry water with you or treat water to make it drinkable.
B. Treating Water.
1. Heating. The surest method of making your water safe is to bring it to a boil, then let it cool. At higher elevations, boil it for several minutes to kill microorganisms because the boiling temperature of water will be lower.
2. Chemical. Available at most camping supply outlets, water purification tablets will kill most waterborne bacteria. The tablets contain iodine, halazone or chlorine. Over time, an opened container will lose its potency. Probably best to replace opened bottles after six months. For clear water, drop one tablet (8mg) into a quart or liter of water and let it stand for 10 minutes. Add 10 minutes if the water is cold or discolored; 20 if both.
3. Filtering/Purification.
a. Filter. Most entry level, inexpensive filters will filter between 1.0 to 4.0 microns-they generally are targeted to eliminate giardia and sediment. Giardia is approximately 2.0 microns in size. So get a filter that will filter below that. Examples: Timberline and Coughlan.
Use in wilderness camping. These basic filters have been used successfully in the Colorado River, Uinta and Windriver Mountains. Cost: about $18-29. They will last about two or three summers of active camping, or about 100 to 400 gallons, depending on the purity of the water you are filtering. Extend the life of any filter by keeping the filter screen away from sediment or the water source bottom
b. Microfilter. Microfilters are generally more expensive, but eliminate more than just the larger microorganisms. Some claim to remove 99.9% of all bacteria, as well as cysts, protozoa and tapeworms. No filter is effective against viruses, such as hepatitis. Viruses are unlikely to be encountered in wilderness camping or from natural water sources. Microfilters generally filter between .02 to 1.0 microns and eliminate giardia and most bacteria. Examples: SweetWater Guardian, PUR Hiker. Use for outdoor camping from natural water sources. If a charcoal filter is present, it may also remove chemicals. Some of these can be field cleaned to extend the life of the filter. Cost: about $49-80.
c. Purifier. Filters to .004 microns and has a silver nitrate or iodine matrix-eliminates giardia, bacteria and viruses. If combined with a charcoal filter, it will eliminate iodine taste and other chemicals. Example: PUR Explorer. Cost: $80-$170. In evaluating any filter or purifier, look at where you will be using it, the cost, water Output, and ease of pumping. Those mentioned above pump about one quart per minute, which is adequate. Some are easy, like the SweetWater Guardian, which requires only two pounds of pump pressure. You can also add a virus/iodine “filter” to it for about $25.
3. BEDDING. (Blanket, Cloth Sheet, Plastic Sheet)
a. Sleeping Bags over Bedrolls.
A variety of inexpensive bags are available. Watch for the type of bag (rectangle vs. mummy-style), insulation, and cold weather features. Mummy bags are warmer than rectangle bags, but are more confining. The trick to avoiding claustrophobia in a mummy bag is to move the bag with you when you roll over; don’t try to roll over inside the bag. For warmth, cinch up the bag around your face. Do not put your face in the bag. Moisture from your breath will be retained by the insulation and will make your bag feel cold. Always breathe outside the bag. Be aware that rectangle bags let a draft down the neck and shoulders. This can be compensated with extra clothing. The rectangle bags are generally too bulky for backpacking. If you like to sleep with your head out of the bag, but your head gets cold, wear a stocking cap. It’s guaranteed to remove any curl from your hair.
b. Some Features to Look for. A good bag will insulate along the zipper and allow the top to cinch around the head and shoulders. Extreme cold weather bags have a draft collar that goes around your neck to keep out cold air. Baffles, or the layers of insulation within the bag should not be sewn completely through all the layers, but should be offset so insulation is as deep as possible. Try holding the bag up to a bright light to see if light comes through near the seams or stitching. If light comes through, cold will too. Insulation materials make a difference. The warmest is down, but it is also the most expensive and requires a little extra care. A good down bag, though, is lightweight, compressible, and can last a lifetime. Store your down bag in a large cotton bag so the down fibers stay fluffed up. Compress the bag in a smaller bag when you are ready to go camping. Down is rated by the number of cubic inches an ounce of down fibers will fluff up to. A rating of 550 is excellent; 750 is incredible. Artificial insulation supposedly will retain heat even though damp. In winter camping a bag tends to retain moisture. Moist air from your body generally freezes when it hits the outer layer of your sleeping. The body puts out about one pint of moisture during the night. The least effective insulation is plain polyester batting. Good insulation is Hollofil, MicroLoft, Quallofil, and Polarguard. Some more expensive bags have an outer layer of Goretex or similar material to allow moisture to pass out of the bag without letting moisture in.
The next thing to look for is the amount of insulation (by weight) that is in the bag. About three pounds of artificial insulation is necessary for a comfortable bag. Good bags will be rated by degrees of comfort. Generally, a bag rated at 20 degrees is a good three season bag. A five degree bag will usually be too hot for summer camping, but adequate for most winter camping.
If you have to sleep in a snow cave, know that snow caves stay about 40 degrees through even a below zero night if the cave is adequately closed in. Regardless of what the conditions have been, always air your bag out after use. Hang it up in a dry place for a day or so. You can wash a sleeping bag in a large front loading commercial washer with a small amount of mild detergent. Tumble dry with a tennis shoe to fluff up the insulation.
c. Sleeping Pad. A ground pad is essential. Most of the cold will come from the bottom, believe it or not, and a good foam pad will allow you to sleep comfortably even on snow!You’ll be surprised in the morning to see you haven’t melted the snow. A tent will add another 5 to 10 degrees comfort, while sleeping in clean, dry clothes will also help to keep the heat in.
Avoid plain air mattresses and open cell foam for backpacking. The first doesn’t insulate well at all. The second soaks up water and won’t let it go. If it gets wet, it’s like sleeping in a sponge. The least expensive pads are made of closed cell foam. They are very effective. Supposedly, they’ll keep down to -20 degree cold away from your back. When it gets colder than that, mountaineers add another pad. A 6 foot pad will weigh only 14 oz. Another excellent pad is a combination of foam and air, giving you the comfort of an air mattress with the insulation of foam. Example: Thermarest. These are self-inflating if you are patient. In theory they can puncture, and repair kits are available. If cared for and put in a protective sack when traveling, you should get a lot of mileage out of one. Mine has been in continual use for about10-12 years and has never needed repair. It is best to store these out of the sack and with the valve open to maintain resiliency.
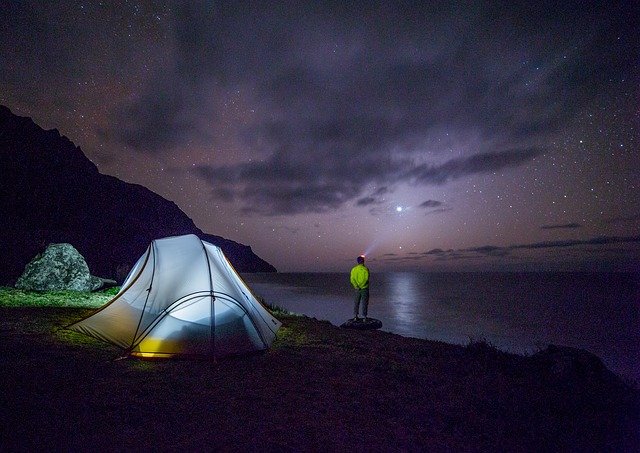
4. TARPS AND TENTS
Tarps are lightweight and versatile. If pitched with the lower edge toward a storm, they can keep you very dry. Fold the tarp in a half triangle shape, or lay another tarp beneath your sleeping pad to keep moisture from your sleeping bag. Tarps don’t keep out night insects, but mosquitoes go to bed shortly after dark. While camping with a tarp in the mountains is okay, I wouldn’t use a tarp in the desert. I don’t like to share my bag with most of the things that crawl around out there.
Tents are now made for about any purpose, number of people, cost, and weight that you can imagine. Decide how many people will sleep in the tent, what you’ll use it for, and how much you can afford. Then shop around. You want a tent that will keep you dry in a driving rain or an unexpected snow storm. Look for a “bathtub floor” that covers the bottom and wraps up from the ground several inches. A good rain fly should go nearly to the ground.
Plan on sealing the seams yourself and spraying the tent with a silicone water repellent each year and more than a day before you use it. This can make a leaking tent weathertight. Other options, such as aluminum poles, extra windows, storage pockets and vestibules are up to you. A two person backpack tent should be under about eight pounds. Good ones are five to seven pounds. Aluminum poles will bear a heavier snow load than fiberglass poles. They cost more, but they weigh considerably less.
If you are car camping, don’t worry about the size or weight of the tent. Get something that is tall enough to allow you to put on your clothes on a cold morning without hitting your head on the ceiling, and a design that will withstand a strong wind. Always peg down the tent to maintain its shape and give it strength. Peg down the guy lines if you suspect wind during the night or while you are away from your tent. (It does have guy lines, doesn’t it?) Even with gear inside they can blow away like a tumbleweed! I once chased one down that was heading for a dip in the Colorado River while its owner was fishing.
5. PERSONAL SUPPLIES AND MEDICATION.
Build your own first aid kit and personal kit. Don’t worry about what others have on their lists. Just use lists for ideas. Make a list of what you use based on problems you have experienced in the past and situations you worry about in the future. Besides first aid supplies and toiletries, include cleaning supplies. Also, make sure your tetanus shots and immunizations are up to Date.
6. FUEL AND LIGHT.
Include matches, candle(s), flashlight and batteries. Save your batteries by going to bed at dark. Don’t take flames inside your tent. Candles are for starting fires when the wood is damp. If you need to find some dry tinder during any weather, including driving rain or snow, go inside a pine tree near the trunk. Look up and you’ll find lots of small dry twigs and branches that break off easily and are highly flammable from the pine resin. Build your fire in an area that is sheltered from the wind. Even if you don’t need one for warmth, fires are therapeutic.
For car camping, the cheapest, brightest light for the campground is the white-gas Coleman lantern. Carry extra mantles; keep them in the container with the lantern. I wouldn’t use them in a tent or house, though. Use your battery-powered light there.
7. EQUIPMENT.
Can opener (on your knife?), dishpan (a pot will double for cleaning), dishes, utensils, matches, candles, flashlight, ax, shovel, bucket, radio (battery powered), paper, pencil.
8. INFANT NEEDS. If applicable.
9. PERSONAL DOCUMENTS.
Scriptures, genealogy records, legal documents (will, insurance policies, contracts, passports, birth certificates, etc.), patriarchal blessings.
10. MONEY. Cash and coins.
Visit Pike Trail for more tips on camping, hiking, travel and other outdoor activities.
Tent Camping is an excellent way for families to go on that much needed vacation when budgets are stretched. The 'primitive' campgrounds favored by tent campers typically cost $5 to $10 per night. This is a substantial savings from even the most basic motels. If you are new to camping [Tenderfoots]:
1. Pick some place close to home for your first outing. In case you forgot something or someone. I have provided my favorite site to locate the campground of your choice.
Options include:
• Commercial sites typically for RV camping with full facilities including Toilets, showers, laundry facilities, electricity and a convenience store.
• Primitive sites are typically at state and national parks. Typically these camp sites include drinking water, toilets, and picnic tables. Some include showers.
• Wilderness camping is permitted in some state and national parks in designated areas. But here you are on your own. No frills here.
2. Make sure you have the equipment you need for the type of outing you are planning. I have provided a Camping Checklist at one of my websites that lists what you might need.
• Don't go crazy. Simplicity is the key. But there are a few basics that will make your camping experience an enjoyable one.
• Stay dry and warm or cool as you like and well fed. I offer 5 necessary key pieces of equipment:
* Tent - These can be expensive. So look around before you buy. Visit campgrounds in your area. See something you like? Ask the campers to take a look. One good thing about camping is that you meet a lot of friendly people. You can get used tents on eBay, at yard sales or at Army Navy Stores. But before you go, check out some new tents on the discount websites for price comparison. Naturally I offer you my own site HIKING CAMPING WORLD.
* TARP String one of these between some trees to provide protection from the sun and rain.
* Sleeping Bag. Most people will want to buy these new ones. Again, shop around to find what you want. Make sure you select a bag to fit you (men's, women's, children) and fits the temperature conditions of intended use. (comfort temperature )
* Sleeping Pad . It may sound like a good idea to sleep out on the ground under the stars, but not only is the ground hard but the cold will penetrate your sleeping bag. There are many low cost lightweight sleeping pads or air beds available.
* Camp Stove. Again cooking over an open fire seems like the thing to do when camping, but shifting winds and rain showers sometimes make this difficult. Again there are many low cost alternatives to choose from. Look for one that will support the number of people in your camping party. And leave the campfire for singing and marshmallows.
Tent camping is also a great 'bonding' opportunity for the entire family. Leave the TV, Game Boys and the latest 'i equipment' at home. Assign each family member the responsibility for an activity during the trip and follow their lead. Can be quite exciting for both the leader and the followers.
And Above all have FUN IN THE GREAT OUTDOORS.
To find more tips and information about camping, visit Pike Trail.

In between our work burden we wish to spend our time with our family and loved ones. Generally we go shopping for clothing or camping food preparation for the barbeque party in your home or go to watch recently released movies and so on. These are common activities done by everybody all over the year. Monotony will accumulate if you do the repeated activities. To come out of it seek an adventurous camp for your family and for you. This would make you relaxed and enjoyable.
You just depart from your regular activities for a particular period. If you do new activities it gives you new experiences full of joy and happiness. Do not frame your own camp and ruin it, just follow the following steps that will assist you more.
The steps are,
1) First decide why you should decide for outdoor camping, because only then you can plan for camping and make a camping preparation list and camping food preparation. If you camp without any reason and without a camping preparation list and camping food preparation then it would lead you to stress, so find the reason. If you get pleasure from outdoor camping then you can have a pleasurable experience there.
2) The next step is to find the best campground for camping. There are more and more campgrounds, if this is a first camp then find a campground nearer to you place. You can find campgrounds near the beaches, lakes and even near mountains.
3) Choose a ground which is wide in order that you can carry out camping, food preparation, fishing, biking, boating, swimming and hiking and so on.
4) If you take kids along with you then execute camp preparation games and you should also be watchful and alert. Check whether the campground provides you drinking water, bathrooms and other comforts.
5) If you choose to reside in a tent then go earlier to the camp ground and select a good one for you with camp preparation games for kids.
6) Prepare a camping preparation list with all the necessary thing needed while camping. Do not forget to take any item in the checklist because it would lead you to trouble. When there are small shops nearer to the campground then it will be feasible.
7) Do not overlook sleeping bags, first aid box, meals, and camp preparation games, sleeping pads, portable stove, chairs, foldable table and the most important tent in the checklist.
8) Another major thing is the day of camping. This will facilitate you to find the season during the camping date and according to that you may take the gears.
You can learn more tips about camping and hiking at Pike Trail

There is nothing like enjoying the outdoors like a good old camper. What better way of experiencing the raw beauty of nature than through careful planning and preparation. One cannot deny the fact that people today are used to having the basic conveniences of living. This leads to the number one priority in setting out for a camping trip - the camping tent.
There are a number of common factors that one should consider in choosing the appropriate camping tent. In general, if a higher quality camping tent is needed the more dollars should be allocated. However this is not always the case. For people who can afford the high end, Eureka tents offer high quality durable tents. In the mid-price range, Coleman sells good quality tents. Ozark or Great Trails would comprise the lower end camping tents in the market.
The first to consider is the number of people who will be using it. This will generally determine the suitable size as well as the style. Speaking of style, there are different styles to choose from. The dome style's round shape offers wind resistance aside from its being small and simple to set-up. In the case of having a good number of campers like 4 to 9 people, family camping tents should be chosen. The umbrella style offers roomy head room for many people and is well-ventilated. Another style that can house many people is screen houses. Compared to the previous style, this offers first-rate ventilation. For the seasoned backpackers and campers, the A-frame style tent and backpacking tent are the ones to choose because it is lightweight and simple to set-up. The latter comes in varying sizes for 2 to 4 people.
Another factor to consider is the sort of conditions the tent will need to cope with. This will in turn lead to choosing according to durability. For those on a budget and those who will be going to fairly good camping locations, the two-season tent is one of the cheapest in the market. The three-season tent is said to be the most popular because it is sufficiently durable to deal with rain throughout the seasons except winter. For extreme weather conditions, the four-season tent is recommended. It is intended for heavier winds and snow compared to the previous style for this kind of tent is comprised of a higher class of fabrics and added poles for increased strength.
For more tips on outdoor activities like camping, and hiking, check out Pike Trail.

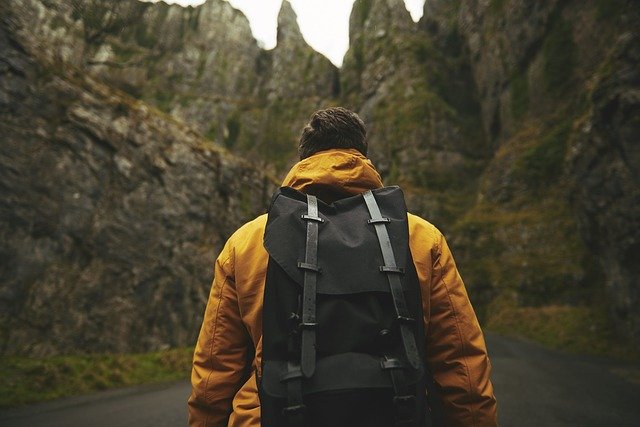
Hiking packs are a necessity for those that plan to hike long miles or over rough terrain. You shouldn’t consider them an option for these circumstances.
They can actually improve the quality of your hike as well as help you to make the entire hike more comfortable. Well designed, well packed hiking packs are designed to provide you with the best possible experience while on the trail.
What To Look For In Backpacks For Hiking
There are many different types of hiking packs on the market, each offering something unique. There are two categories that these fit into.
They are either framed or unframed packs. Frames are important for long hikes. This frame will provide you with the help in maintaining the pack’s shape.
They are also heavy duty and can take the beating you’ll be giving them. You definitely want a pack that is easy for you to carry, but a framed pack will help to keep the pack evenly filled. In addition, it is likely to handle more equipment.
In fact, when considering framing, consider it if it is externally framed or if it is internally framed. Internally framed hiking packs are often the more popular choice because they provide for more comfort and they are easier for you to carry since they conform to your body’s shape.
The best comparison for you to do is to put on two different hiking packs and consider how well they fit your body.
Consider several options. Finding the right size that fits your body is essential. You want to find the right comparison between the size that is comfortable for you to carry and the size that you need for your equipment.
Probably one of the most important things that you must consider here is the weight of the actual pack.
The lighter the pack is, the better it will be for your overall benefit in the long term. Remember, you’ll be filling that pack with equipment so look for one that is three pounds or less when it is empty. You don’t want hiking packs that are too heavy because they will just weigh you down even more so.
While there are advantages and disadvantages to all types of hiking packs, the best one is one that is comfortable for you to carry.
Put one on and walk around with it. If it just doesn’t fit right, take it back. You’ll be carrying lots of weight, up and down hard terrain. The least of your concerns should be your pack. Instead, focus on your trail instead.
Want to buy hiking equipment? Check out Pike Trail, they offer equipment at an affordable price.

For those of you with an entire family to please, finding an ideal summer vacation can mean coming up with more questions than answers. Will the kids enjoy camping? What might we do while camping? How can I get some fishing in? Should we go north or south this summer?
The clever vacationer will be able to answer many of these questions with one simple answer: one vacation that includes something for everyone.
Half of the battle of vacationing effectively is filling your time with activities and adventures that truly help you cut loose and relax. On vacation, idle time can often be wasted time. That’s why this article will explain how to merge a camping and fishing trip into one fun, easy vacation.
First, the other half of vacationing effectively is planning.
If you’re going to have a great fishing trip on top of a great camping trip, you’ve absolutely got to scout for the best sites that integrate both. Some great camping sites won’t have any access to good fishing, and some of the best lakes don’t have any camping possibilities whatsoever. You’ll need to search for a camping site, first and foremost, but you’ll also have to make sure it has access to a clean body of water that’s known for good fishing.
Set aside one Saturday well before your vacation simply to do research. Make good use of search engines and their mapping tools to find phone numbers you can call immediately to get a good idea of what camping sites might work best for you. Keep a list of your impressions of each, and whittle down your list to the top three or so candidates.
Second, you’ll want to consider how you’ll actually accomplish your fishing once you’re at the site.
Can you do it off the platform? Chances are you’ll want to rent a boat instead, so this should be one question you ask your campsite early in the conversation: are boat rentals available, and how much do they cost?
Don’t be afraid to ask about the local fishing, specifically the types of fish you can expect to catch and how deep the lake might be. These will give you clues as to what bait to bring, and a little more research will help you make the most of your fishing outings once you’re out on the water.
Once you’ve done the planning, much of the vacation will fall into place. Simply bring along the right baits, tackles, and tools you need to catch fish and be ready to enjoy a camping trip that will keep the entire family occupied.
link text to learn more about camping.

Using a map in the field can be quite an undertaking if you do not know what you are doing. One of the main tips on camping is to be prepared. The Boy Scouts had it right. Here are tips on using your map that can help ensure you know exactly where you are and have a map that can survive your camping trip.
1. Find an as updated map as you can find. This might seem obvious to some; however, using a map that was made 10 years ago may neglect to mention new landmarks. By getting the most recent map you can find, you give yourself a much better chance of not being surprised.
2. Make sure the map shows all relevant landmarks. The map you choose should correctly show the location of roads, railroad tracks, streams, creeks, rivers, etc. In remote wilderness areas, these landmarks provide you points of reference which can help you determine where you are when your compass misleads you or if you have managed to lose your compass.
3. The map should include elevation numbers. This means you want to find a topographical map. These types of maps are especially important if you are in a hilly or mountainous region. Knowing the elevation of different points will help you chart your course and determine how long it will take you to travel.
4. Protect your map. Maps get roughed up pretty good on a regular camping trip. With the wind and rain always an issue, it is a good idea to take extra care with your map. Here, are some tips on how to do it:
a. Laminate the map. This will give the map some rigidity that will protect against wind damage and waterproof it or
b. Place the map in a plastic bag. This method will allow for protection from the rain. The disadvantages are you will end up having to take the map out and fold it another way so this section can be seen through the plastic bag and it does not have the same amount of rigidity as a laminated map and thus is susceptible to wear due to continuous folding and unfolding of the map.
5. Use your map at home first. Make sure you understand the legend and other indicators on your map. If you are unsure of the information, go back to the store where you purchased the map or contact a representative at Mapsco. They should be able to answer your questions. It is far better to swallow a little pride at home and admit you need help rather than finding out in the field that you really needed to know what something meant.
6. Recognize nature’s direction indicators. There are few rules and myths you should recognize about how nature tells you what the directions are:
a. The sun rises in the east and sets in the west. If the sun is visible, you can use this to help determine all four directions.
b. Moss does not just grow on the north side of trees. It will actually grow anywhere and so this myth should be ignored.
c. Rivers will tend to run south. However, there are a large number of exceptions to this including: St. John’s River in Florida, the Willamette River in Oregon, and the Monongahela River in West Virginia.
With these tips on camping, you should be able to pick out a quality map and have more success in determining exactly where you are while camping in even some of the most remote areas.
Check out Pike Trail for more camping tips.
Tips from a Personal Trainer
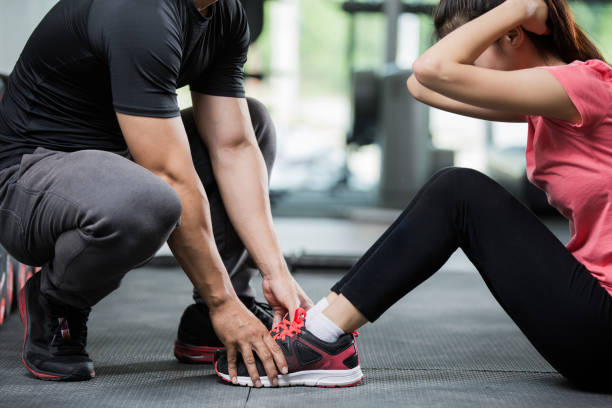
The Personal Trainer is the one responsible to support you during your exercise sessions, guiding you in your eating plan working together with you to motivate you to achieve your goals and track the development of training.
Here are "10 basic and general counsel of a Personal Trainer
10 basic tips and general of a Personal Trainer
1 - Consult a physician before beginning any exercise program.
2 - Be sure to 5 to 10 minutes of exercise followed by aerobic light stretching before every workout to increase strength and reduce the chances of injury. Also start work and any muscle group with an additional set of heating from 12 to 15 repetitions with a weight "light."
3 - To speed up fat loss and reduce the chances of cardiovascular disease, cardiovascular exercise at least three times per week for 20 to 60 minutes in his heartbeat interval (220 minus your age, and this figure multiplied by 0.60 to 0.85 depending on your fitness level.
4 - Clothing: to practice the exercise, the most appropriate clothing to be comfortable is Lycra or cotton. Those wishing to be muscular or those who wish to be "sexy" would probably be inclined to Lycra clothes. Now if you prefer to feel comfortable as you develop your routine, cotton clothes are appropriate. You can check out the best mens fitness apparel from De La Cross Fit Apparel.
5 - It is advisable to drink about two liters of water to renew the body fluid. It is important to note that the body regulates water needs by thirst. Not "swell."
6 - Most people forget the importance of stretching. Both before and after exercise stretching can help prevent injuries and cramps after a hard workout.
7 - Do not cheat!. It is common to see people on the stair machine leaning on the rails for strength. It is better to reduce the degree of resistance that "trick." Know that for every 5 kilos that rely on the rails is approximately 8% burn fewer calories.
8 - The athletes need a more protein than sedentary people. Have to consume up to 2 gr., 2g. and a half of protein per kilo bodyweight per day. The best sources of protein are:
fish, chicken, lean meat, egg whites and protein powder or whey protein.
9 - Before starting your workout, warm up. This will avoid possible injury, both muscle and joints.
10 - About two hours before going to the gym eat carbohydrates, as they will be the "fuel" to use during training. Get it from fruits, cereals, pastas, and they provide quick energy for muscles and also digested faster than protein and fat.
For more tips from a personal trainer, check out De La Cross Fit Apparel now!